Wednesday, October 20, 2010

Fall...

..is awesome. Best season of the year. Besides great weather, beautiful colors and Halloween it has one of my favorite things to do...walk through the garden and pick chiles. Referred to most of the time as chili peppers in the U.S., I have grown a lot of different varieties over the years but I always make sure I plant plenty of Jalapenos. 100 plants this year to be exact, along with 50 Serrano plants. It all started over ten years ago when I friend from work brought me some Coban chiles from Guatemala. They were the most beautiful, small, dark red and smoky hot things I have ever tasted. I had to find out how to make this stuff myself. I found out that Chipotle is the name given to smoked-dried Jalapenos and I have been making it ever since I tasted my first one. Some years the Jalapenos are hotter than others but after smoking numerous chiles from Anaheim to Habanero I find that I love the rich smokey taste and tolerable heat of the jalapeno when adding more than a few teaspoons to a given dish. This years crop was hotter than usual and the Serrano chiles even more so. Honestly, I eat it with most things for breakfast, lunch and dinner and nothing seems to taste as good without it. Here is what you need to do to make your own:

Have some space to plant-


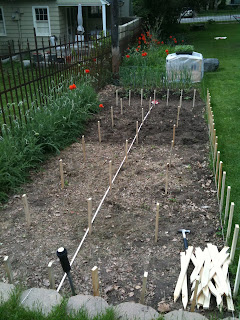
Grow your own Jalapenos from seed or buy starters from a nursery like I usually do-


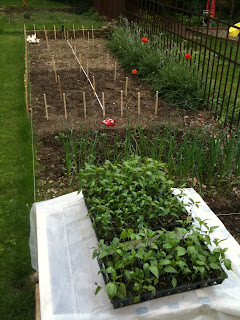
Spend an afternoon planting them-


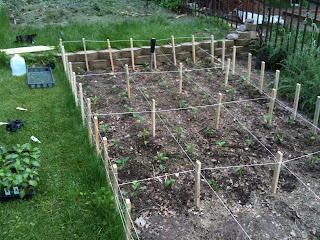
Water, fertilize and weed-


Get excited when the first ones show up in the middle of summer-


Enjoy your summer and don't forget to water-


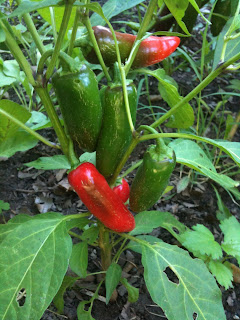
When the pumpkins start turning orange, the jalapenos will be turning red-


Pick a day when you can harvest as many Jalapenos as you can smoke-


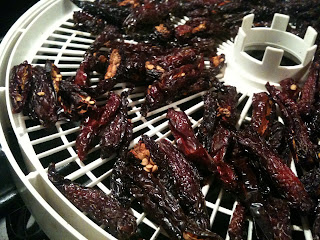
Cut in half, place in trays, start your charcoal and smoke the chiles anywhere from 6 to 24 hours using apple, hickory or any other good smoking wood-


After smoking them I put all of mine in a dehydrator for a day or more until all of the moisture is gone-


After they are completely dry I throw them in a food processor and then a spice grinder. Some blenders can process them into a powder in one step but mine cannot-


Hopefully you now have enough to last all year. I usually make enough to give half of it to friends that have become hooked on the stuff. Enjoy!

Sunday, October 17, 2010

Demon scarecrow...

Before Halloween was even over in 2009 I had planned out what I wanted to do in 2010. I imagined making a dozen or so demon scarecrows and mounting them all along my fence by the sidewalk and driveway. They would be about nine feet in the air looking down slightly to the sidewalk and have glowing eyes and outreached hands like they were about ready to grab the kids as they walked by. A friend of mine wanted to start decorating his house for Halloween and he asked me to make him a prop earlier in the year. I told him about my idea that I had for demon scarecrows along my fence and he told me he would love to have one. I thought this would be a good way to learn the process of paper mache and what it would take to make one from start to finish. After six weeks of conduit bending, paper mache, painting and wiring lights I had finished one demon scarecrow and realized there was no way I would be able to make as many as I originally wanted to. Even though I figured I could make them a lot faster now that I knew how to do it, I gave up on the idea and put it on the back burner for another year.


This is how he mounted it in his front yard...


FCG X 3...

Having bought a couple of wiper motors during the summer with plans of using them on a project I put on hold, I still wanted to at least use one of the motors for something this year. I read somewhere that a Flying Crank Ghost is a great first animated prop project to build so I decided to make one. Since I was putting mine in a second story window where there were actually three windows side by side, I decided to run three ghosts off one motor. I don’t have any good footage at night with the black lights illuminating the ghosts yet since the only video camera I have at the moment is my iphone and it is useless in the dark.


Saturday, October 16, 2010

Lunch in the cemetery...

Nothing like a family lunch outside as the leaves are turning...

Lanterns

I was only able to get two of these finished this year, though I imagined making many of them and hanging them all over the yard. I modeled and rendered my idea first, then built them. Not having a ban saw resulted in me changing the design to make them easier to make. Jack is holding one and the zombie is holding the other.


Friday, October 15, 2010

2009 - Jack...

After a few years of Halloween projects under my belt I felt it was time to do something that required a little more planning. I started thinking about Halloween all year long and I couldn't wait to do something new for 2009. After building it over and over in my head for months, when August came I started construction on a 12 foot Jack Skellington. I had seen some really cool steel Jacks at Disney's Haunted Mansion while we were at Disney Land one year in October but I wanted mine to be able to be put into different positions which meant it had to be as light as possible. After many weeks of learning all kinds of new things about prop making, I managed to get him finished the week before Halloween. I had a lot of people asking me where I bought it and got many disappointed faces when I told them I had made him. The rest of the props just got moved to new locations around the yard.


2008 - Coffins...

Remembering the long hours with the jigsaw in 2007 I decided on a much faster project of building a couple of coffins. I also had a hard time passing up a new zombie and flying reaper from the Halloween store that year. All of the previous decorations made a return as well and the yard finally felt like it was starting to be populated and not look so sparse.


2007 - Cemetery Sign...

Realizing that buying a new prop every year could get really expensive I decided that making our own decorations would be a lot cheaper. Based on a sign that the local Target store by us had decorated with that year, I designed this sign to put at the front of the side yard for our small cemetery. It printed on about 34 pieces of 8-1/2 X 11 sheets of paper. 25 hours of cutting with a jigsaw made me never want to make another one. This was also the first year that I started hanging some of my props in the trees in September. Who says Halloween should only be in October?

2006 - We're hooked...

Those few decorations the first year were enough to give us the haunting bug. Next from the Halloween store came the 12 foot clown and half demon. We ended up dropping the clown on the kids as they walked up the driveway and it was a big hit. The reaper on the stone bench and some foam pumpkins were stolen that year. :(


2005 - The beginning...


Proudly hanging from a sycamore tree is the first Halloween prop we ever bought. Foam pumpkins on the fence in the spirit of everyone's favorite animated film The Nightmare Before Christmas. My wife's reaper sitting on the stone bench and six headstones that I cut out of plywood, painted, and stenciled.

A couple of spiders and a motion activated bone prop above the porch.